Adobe Fresco VS Procreate [2022] (Best of the Best)

It’s a debate that has been around as long as digital art itself – which program is better for creating art, Adobe Fresco or Procreate?
While both programs have their pros and cons, in the end, it really comes down to what the artist prefers.
In this blog post, we’ll take a look at some of the key differences between Adobe Fresco and Procreate, so you can decide for yourself which one is right for you.
What exactly is Procreate?
See Other Related Articles:
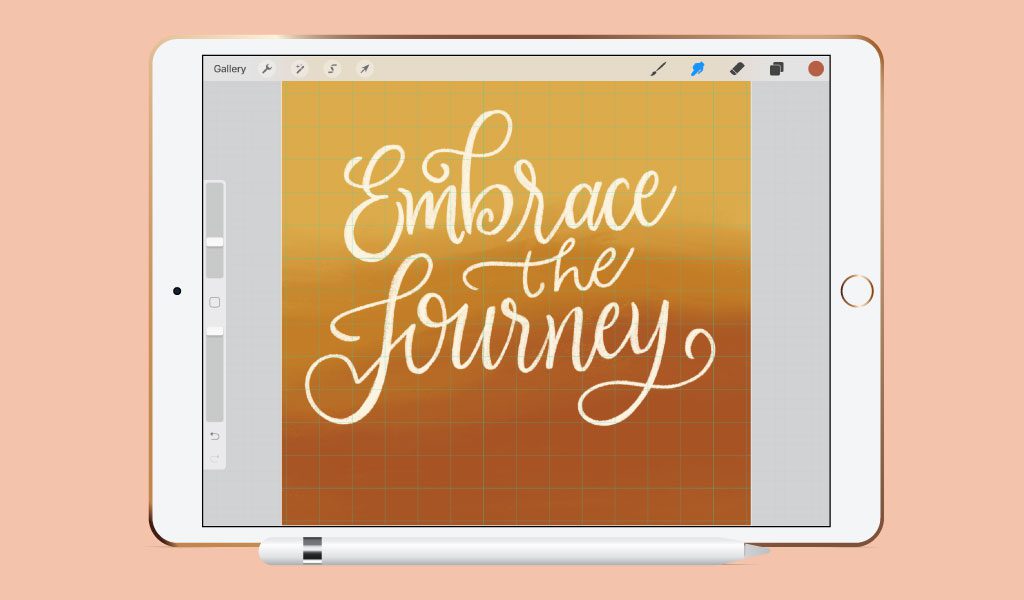
Drawing, illustrating, and prototyping artwork are all possible with Procreate, which is a strong tool for creating artwork.
Since its first release in 2011, the program has received numerous modifications in order to keep up with growing client demand in clip studio paint.
This award-winning digital drawing application is available for both the iPad and the iPhone, and it has a reasonable price of $9.99 for the iPad and $4.99 for the iPhone Pocket edition, making it an excellent value.
It appears straightforward, but the program’s brush library, layer modes, different effects, and raster profile make it a powerful tool in the hands of artists of all skill levels.
The UI of Procreate may also be completely customized, even down to the gesture controls and brush parameters.
The software includes a large number of high-quality brushes that may be used for both wet and dry applications.
Despite the fact that it has an almost limitless number of features, tools, and brushes, this digital adobe illustration draw software remains a formidable tool for both creative experts and amateurs.
What is Adobe Fresco, and how does it work?
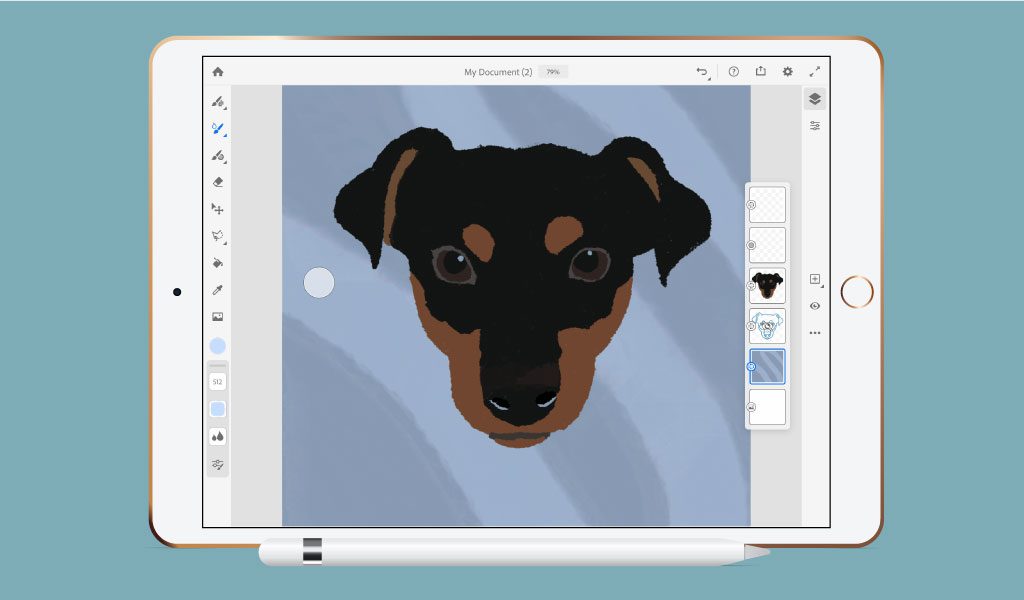
Adobe Fresco, originally known as Project Gemini, is a digital sketching application that incorporates brushes that are similar to those used in Photoshop software.
With its widely acclaimed live brushes, as well as vector and pixel brushes, the application places a strong emphasis on its drawing and painting skills.
Fresco’s live brushes are designed to simulate the movement of watercolor and oil paints, giving your work a hand-drawn feel.
While Fresco is primarily intended for use in graphics and painting applications, it also has a variety of effects and actions for usage in other applications.
Adobe Fresco is fully free for users who have a Creative Cloud membership; for those who do not have access to Creative Cloud, Adobe Fresco can be purchased separately for a monthly fee of $9.99 (plus taxes).
How the Two Apps Differ from One Another
iPad painting apps Procreate and Adobe Fresco have both been acclaimed as the best digital drawing applications available.
However, how do the two software compare in terms of their aesthetic, brush library, layer capabilities, and other aspects of their functionality?
1. Layout in General
When it comes to the overall design, each application tends to follow a similar minimalist approach to the layout.
Despite the fact that the appearance of both software is nearly the same, the way they are set up tends to differ.
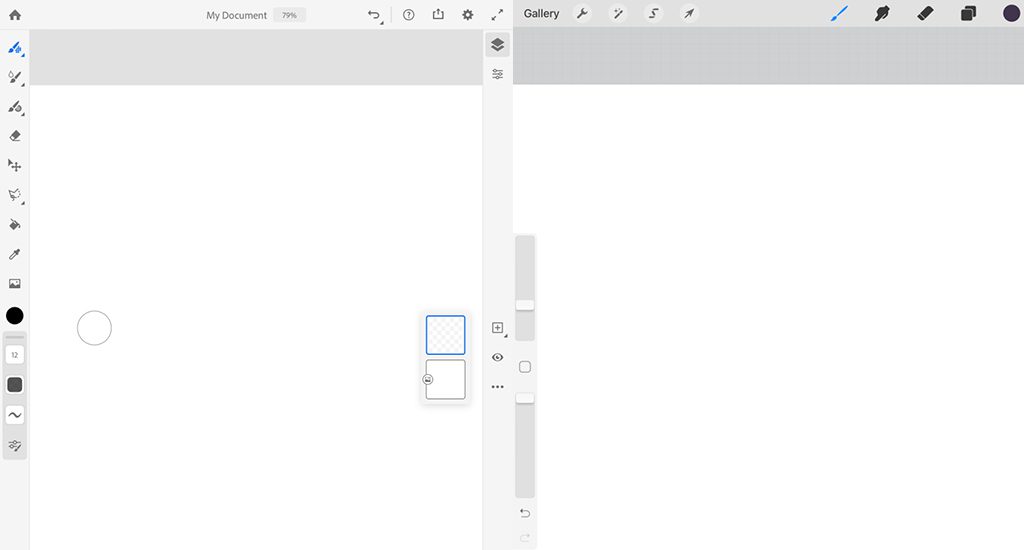
Procreate places the majority of its tools in the top toolbar, but Adobe Fresco places them all on the left-hand side with the layers feature on the right.
Adobe Fresco is a photo editing program that uses Adobe Photoshop.
The Fresco layout is on the left, and the Procreate layout is on the right.
Because Adobe Fresco is similar to Photoshop, the two programs’ overall setup appears to be identical.
For its part, Procreate is a stand-alone program, which means that the software’s main setup is unique to the program itself.
2. Interaction with the user
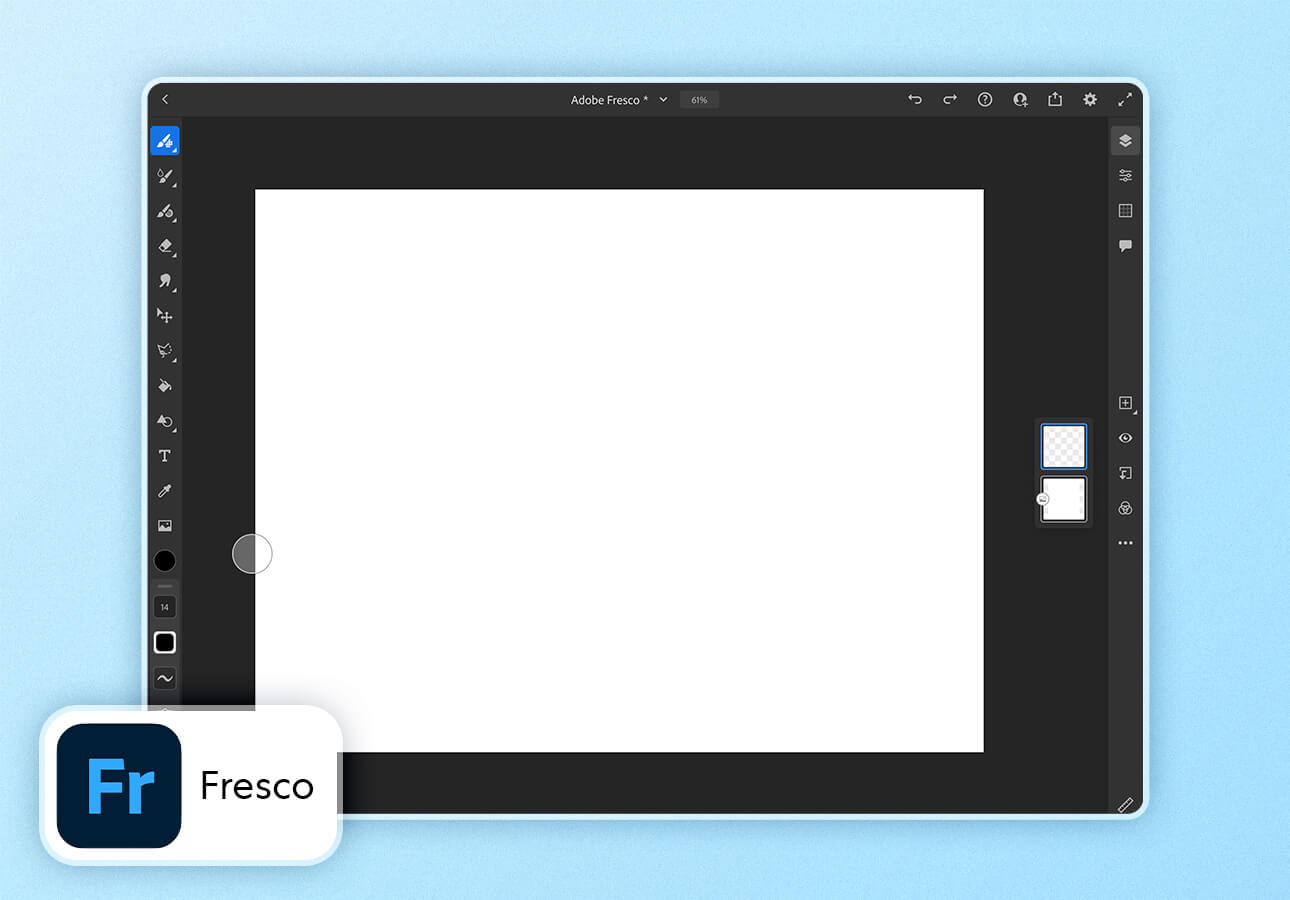
When compared side by side, the interfaces for Procreate and Adobe Fresco are quite similar.
Adobe has always done a wonderful job of keeping the appearance and feel of all of its products uniform.
For example, if you’ve already worked with Adobe Illustrator or Photoshop, you may find that not much about Adobe Fresco is unknown to you.
One aspect of the Fresco interface that I particularly like is that everything takes place on a single screen.
Changes to brushes are made via a different interface that appears on a second screen in Procreate.
In Adobe Fresco, you have pop-up windows that can be moved about freely, allowing you to remain on the same screen as your work at all times.
Adobe Fresco offers a more personalized experience, and as a member of the Adobe Creative Cloud, the rhythm of working with Adobe Fresco felt very natural.
Although I enjoyed the app, there are a few features that I would want to see implemented in future editions that I felt were lacking.
Because there are no standards or grid snaps, it was difficult for me to determine whether or not my work was level and centered on the artboard.
To begin with, Adobe Fresco has a ruler tool that allows you to draw lines on your artboard at any angle, as well as snapping at 90o and 180 degrees.
Call me a slacker or neurotic, but I like the grid view in Procreate and hope that it will become an option in Fresco in the near future.
2. Gestures and Characteristics
There are various movements and shortcuts in Procreate that have become nearly second nature to many creatives (has anyone else noticed how you can double-tap your sketchbook to undo something?).
Adobe Fresco, on the other hand, has a plethora of functions that are similar to those found in Adobe InDesign.
Undo with a double-tap with two fingers, zooming in and out with two fingers, canvas rotation with two fingers, drawing a straight line with two fingers, and many other features.
Adobe Fresco has a number of unique features, one of which is its touch shortcut, which you may find fascinating.
Holding it down allows you to do more with specific tools if you keep it held down.
In the case of a pixel or vector brush, for example, pressing and holding the button will transform the brush into an eraser tool.
Isn’t it kind of cool?
It also triggers unique blend states for the live brushes, which are designed to simulate the look and feel of traditional painting media.
Due to the extensive capabilities of this small button, you will be provided with a “touch shortcut map” to assist users in navigating around the functionality.
3. Creating Shortcuts
Shortcuts should be created.
Gestures that can be employed while in the application are more numerous in Procreate than in other drawing applications.
You can adjust the shortcuts indicated above by going to Actions (wrench icon) > Preferences > Gesture Controls.
The shortcuts shown above are default shortcuts.
Fresco Shortcuts are a set of shortcuts that can be used in Fresco.
Only a tiny number of motions are available in Adobe Fresco, and none of them may be customized.
Click on the question mark icon at the top of the software and then click View Gestures to get a list of the available shortcuts.
4. Brushes
Both Procreate and Adobe Fresco include extensive Brushes menus, which are among their most appealing features.
Fresco includes brushes in a number of different types, including live, pixel, and vector.
Procreate, on the other hand, includes a large raster brush collection that includes everything from charcoal to calligraphy to sketching.
To access the brush library in Procreate, click on the paintbrush symbol at the top of the program to open the brush library in the program’s window.
You’ll notice that the brushes have been divided into several groups.
Simply select a category from the drop-down menu to see a list of the brushes available in that category.
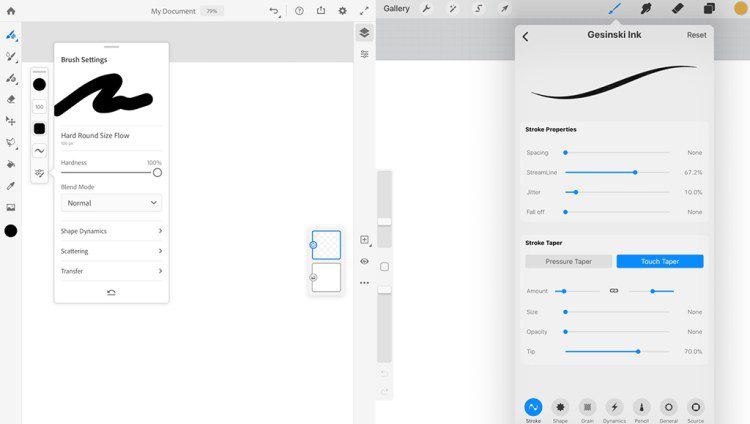
On the left is the Adobe Fresco brush collection, and on the right is the Procreate brush library.
The brushes in Adobe Fresco can be located in the first three brush icons on the left-hand side of the program’s interface.
Depending on your composition, you can use pixel, live, or vector brushes to create your effects.
Pixel brushes are designed to look like raster Photoshop brushes.
Live brushes are designed to mimic the movement and dispersion of oil and watercolor paint brushes on paper.
Vector brushes are particularly useful when working with graphics that need to be scaled without losing quality.
Brush Preferences
In addition to the numerous brushes available in both programs, you can adjust the brush profile even further in order to meet the specific requirements of your composition.
In addition to Procreate’s extensive brush library, the application allows you to customize the appearance of a single brush by adjusting its spacing, StreamLine, taper, form behavior, grain, and other characteristics, among other things.
Click on a brush to edit its settings, and then drag the sliders to change the brush’s characteristics.
Once you’ve made your changes to the brush’s settings, you can save a copy of the brush to save for future reference.
Brush settings for Adobe Fresco on the left, and brush settings for Procreate on the right.
Even though Adobe Fresco does not have the same number of brush options as Procreate, it does let you customize the hardness of a brush’s strokes as well as its shape dynamics, scattering, flow, smoothing, and blend mode.
By selecting one of the last four icons in the toolbar, you can change the brush profile of the selected brush.
When compared to Photoshop and Procreate, the disadvantage of Fresco’s brush settings is the lack of adjustment options.
Another drawback is the inability to copy previously modified brushes.
Colors to Choose From
The color options should be easily accessible within the program when creating your illustration in either Procreate or Fresco.
The Color option may be accessed through the solid circle icon located in the left toolbar of Adobe Fresco.
This panel allows you to change the color of your image by dragging your cursor across the color wheel, increasing the hue’s opacity, or changing the HSB (Hue, Saturation, Brightness) or RGB (Red, Green, Blue) sliders, among other methods.
Any colors that have been used recently in the document are kept at the bottom of the color palette.
While the color options in Fresco are easy and straightforward, there are no alternatives for inputting a hex code or building custom color palettes.
Color options for Adobe Fresco are on the left, and color options for Procreate are on the right.
The Color menu in Procreate, on the other hand, provides a more thorough method of producing bespoke hues.
A total of four different perspectives are available within the panel, which are as follows: Disc, Classic, Value, and Palettes.
On pressing the Disc button, a circular display of colors is displayed on the outer ring, with saturation levels displayed on the inner ring.
The Classic tab has a larger square display of a certain hue with varying levels of saturation, but the Modern tab does not.
You can change the color by sliding the hue slider across the screen.
The Value button displays sliders for the hue, saturation, and brightness of the image, as well as RGB sliders.
Specific color values or hexadecimal codes would be entered into this tab, if applicable.
Finally, the Palettes tab allows you to access all of your saved color palettes in one convenient location.
5. Contest for Popularity
I decided to check each app’s discoverability by searching for “drawing applications” in the App Store for the iPad with a keyword search.
Procreate was one of the first few applications to be featured.
In fact, Adobe Fresco was completely inaccessible on that page.
It wasn’t until I looked for “Adobe” that I discovered Fresco was listed…at the bottom of the results.
Having said that, Procreate has been available on the market since 2011, whilst Adobe Fresco has only been available since late 2019.
The difference between putting yourself in the market and taking years of customer feedback into consideration to create the greatest product possible is significant.
6. Layers
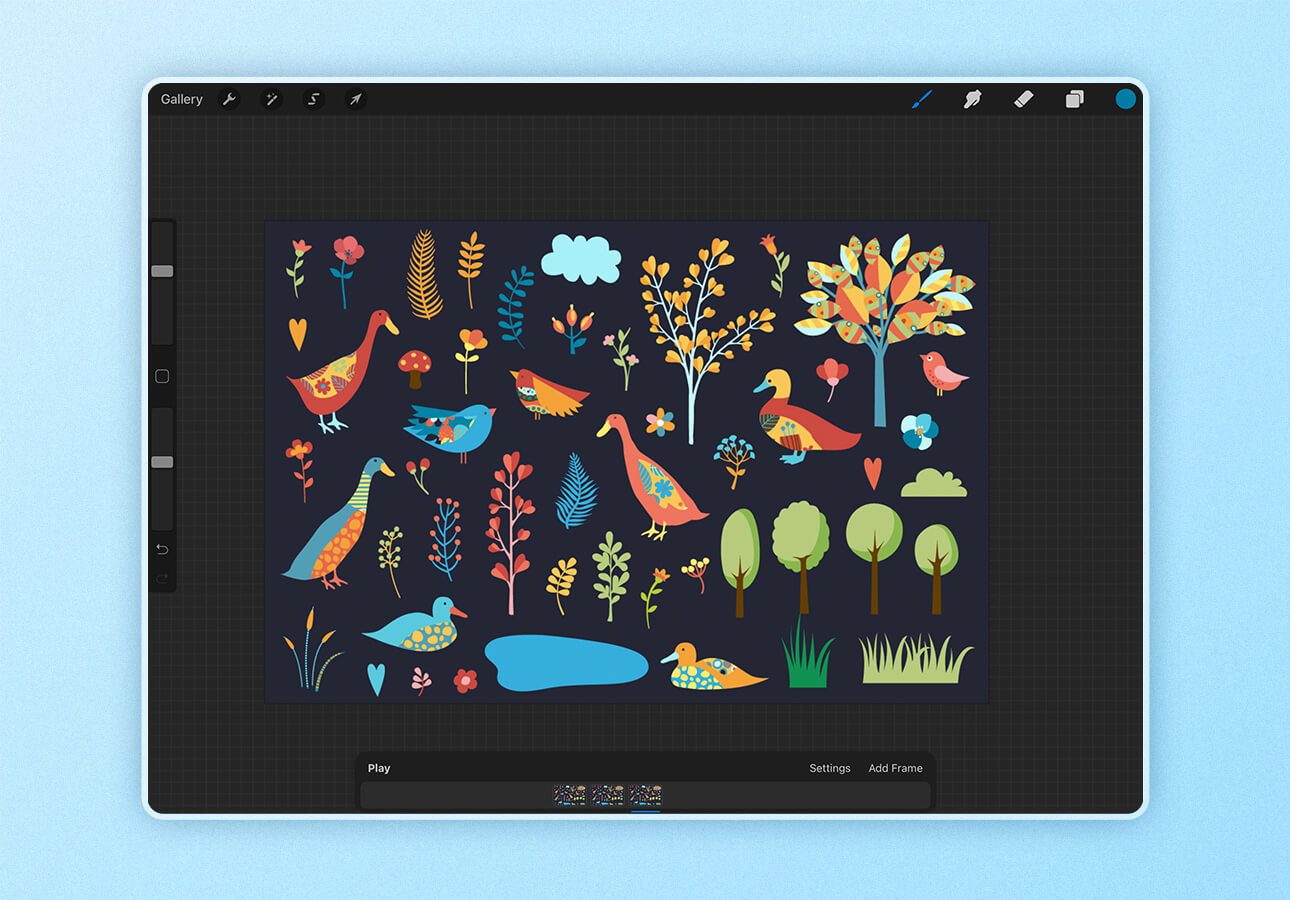
Especially crucial in any drawing software is the use of layers.
They serve as a means of organizing your composition and provide the flexibility to rearrange or edit illustrations as needed.
The Layer panel is located on the right-hand side of the Adobe Fresco software.
Each layer is represented by a square in the preview window.
The Layer Actions menu can be accessed by selecting the dropdown icon in the layer preview window.
This allows you the power to add, hide, delete, duplicate, copy, and cut the layer as well as move it across the screen.
You can also use masks to make non-destructive edits to the layer’s contents.
The Layer Properties can be accessed through a separate dropdown menu that can be located beneath the layer symbol in the upper right corner of the program’s interface.
Even though Fresco’s layer setup is relatively simple, I find it to be quite difficult to navigate when compared to Procreate.
The layers menu in Fresco is on the left, and the laters menu in Procreate is on the right.
The Layers menu in Procreate can be accessed by clicking on the overlapping square symbol in the top toolbar.
It appears to me that the Layers configuration in Procreate is quite identical to that of Adobe Photoshop, even down to the appearance and blend options.
With a few simple swipes, you can simply add, duplicate, delete, merge, or alter the order of the layers in your document.
Along with opacity and blend mode modifications, each layer offers its own set of options.
In addition to modifications, Procreate’s layer possibilities are virtually limitless; you may use masks, fill the layer, flip the layer’s colors, and a plethora of other options.
7. Price
Being an artist can be extremely expensive, and the money we put into our tools is really valuable.
Everything from our equipment and accessories to the apps we use can make a significant difference in our overall well-being.
Once you’ve identified the appropriate equipment, the following step is to identify the applications that will assist you in bringing your inventions to life.
When looking around for drawing software, you will typically come across two major pricing models: the one-time purchase model and the subscription model, which are both described here.
When it comes to purchases, Procreate makes it simple with single purchases through the App Store:
Procreate on iPad is available for $9.99.
Procreate Pocket for the iPhone is available for $4.99.
However, while Procreate for iPad has received considerable attention, the Procreate team has developed a version of the app exclusively for the iPhone.
It’s more than just Procreate without the need of a stylus; it’s a means of getting the most out of Procreate in a more compact packaging.
This innovative approach to designing the app from the ground up for a more compact mobile experience is a one-of-a-kind accomplishment.
Adobe is well-known for its usage of the subscription model, but with Fresco, the company has adopted a slightly different approach.
Adobe has made Fresco available for free on a freemium approach, as opposed to charging for it. If you decide to upgrade to get the most out of the app, it will cost you $9.99/month after a 30-day free trial.
Subscribers to Adobe Fresco can sign up for one of the following subscription plans:
Adobe Design Mobile Plan is available for $14.99 a month.
Monthly subscription to Adobe Photoshop Single App Plan for $20.99
Adobe Fresco Single App Plan is available for $9.99 per month.
Adobe All Apps Plan is available for $52.99 per month.
It’s a lot of information, so let’s break it down.
Adobe Fresco, Illustrator for iPad, Photoshop for iPad, Spark Post, and 100 GB of Creative Cloud storage are all included in the Adobe Design Mobile subscription plan.
With this package, you’ll get a 50 percent discount on some of their top design apps for the iPad.
This strategy streamlines a designer’s complete mobile workflow from start to finish.
Everything from painting and photo editing to generating social media posts may be accomplished with it.
Photoshop, Adobe Fresco, and 100 GB of Creative Cloud storage are all included in the Adobe Photoshop Single App subscription.
Since its first release in late 2019, Adobe Photoshop for iPad has achieved significant advancements in functionality.
You can edit and create composites with pixel-accurate precision right on your tablet.
This bundle, which is intended to be a companion program to Adobe Fresco, strengthens the intention of having these two programs function in tandem.
A standalone purchase of Adobe Fresco’s premium capabilities, the Adobe Fresco Single App Plan provides access to all of the software’s features.
Commensurate with my previous statement, the Fresco app is always available for free, albeit with reduced functionality such as a smaller brush selection and limited Creative Cloud storage, as well as no support for high-resolution images.
For those who want to take their Fresco experience to the next level without having to pay for other Adobe products, this is the most cost-effective option.
This is the most expensive plan because it contains all 20+ Adobe products, which makes it the most comprehensive.
You can be as creative as you want with this plan while drawing and designing because you have access to every software tool that Adobe has developed.
Not to mention that all Adobe premium subscriptions include access to Behance, the company’s social media platform, where you can post, share, and follow the work of other artists you admire.
Students and teachers can take advantage of Adobe’s student and teacher discounts, as well as sitewide deals that occur regularly throughout the year.
Those are some of the ideal times to take advantage of big discounts on programs and apps that you’re interested in trying out.
8. Exporting and Platform Compatibility are two important considerations.
Compatibility is just as crucial as pricing in terms of purchasing decisions.
There are a variety of devices that are compatible with Adobe Fresco, including Microsoft Windows Surface tablets.
It doesn’t matter whether or not you have pressure-sensitive touch devices and a stylus; you’re good to go.
Because of this, artists will have more opportunities to utilize and experience the app, regardless of whether or not they are using Apple gadgets.
Adobe Fresco has the ability to export to the following file types:
- PNG
- JPG
- PSD
Keep in mind that the free edition of Adobe Fresco restricts your ability to export in high resolution and stops you from exporting in the PSD or PDF formats, among other restrictions.
You now have the ability to send your work directly to Adobe Illustrator on your desktop computer from within Fresco.
Using the Send to Illustrator tool, you can extend your workflow by using a computer that has been signed into the Creative Cloud desktop application.
Because of this, it will be even easier for you to expand your vector process to include other apps.
Procreate has the ability to export to the following file types:
- Procreate
- PSD
- JPEG
- PNG
- TIFF
- GIF with animation
- PNG with animation
- MP4 with animation
- HEVC video with animation
Procreate is only compatible with the iPad tablet and the Apple Pencil at this time.
When you exclusively use Apple goods, you have the advantage of being able to take advantage of technologies such as AirDrop, which allows you to share artwork from your iPad to your other Apple devices in real-time.
In addition, you can print directly from both applications, which makes bringing your work to life even more straightforward.
9. Organization, file management, and cloud storage are all important.
It is vital for digital artists to keep their files nicely organized so that they are easy to find and access.
When you first launch Adobe Fresco, you are presented with four sections:
- Home
- Your Efforts
- Learn
- Discover
Under the Home tab, you may find a section titled Recent that contains a list of your recent work.
You have the opportunity to create folders and organize your work within those folders under the Your Work section of the menu bar.
Your document viewing options can be arranged by name or by the date and time that the document was edited or originally generated.
Fresco takes advantage of Adobe Creative Cloud’s capabilities, allowing you to access all of your files from any device, whether online or offline.
With any premium membership that includes Fresco, you have the ability to save up to 100 GB of documents in the Creative Cloud.
Any files that you accidentally delete can be recovered by clicking on the Deleted tab under the “Your Work” section if you decide to undo your decision.
Things are rather basic while working with Procreate.
When you first open the app, you are taken to your Gallery.
Stacks are a way to organize and categorize your Procreate files so that you can move them around freely, regardless of the file name or the date they were created.
When it comes to saving your work, Procreate asks you to take on a little more responsibility than other apps.
You’ll have to rely on iCloud Drive storage if you don’t have file syncing enabled.
You may find it useful to set up a Procreate folder on your iPad’s Files app and save all of your artwork as Procreate files in that folder, even if the Procreate development team states that iCloud backups are a safe way to keep your data (according to the Procreate dev team).
While it may seem time-consuming, being conscientious of your file management with Procreate is worthwhile since work that is unintentionally lost or deleted is irretrievably gone.
Our Final Thoughts
There is no such thing as a one-size-fits-all app, and it’s exciting to see new apps emerge and mix things up.
Hopefully, this side-by-side comparison has assisted you in determining which software will make it easier for you to create the art that you enjoy creating the most.
Paperlike is yet another tool that will undoubtedly make the process of creating digital artwork easier.
Because of the increased resistance on your screen, you will have less slippage when sketching with your Apple Pencil, and you will have a more natural drawing experience.
Furthermore, the Nanodots technology lowers glare and makes drawing indoors or outdoors a breeze!
Frequently Ask Questions
What is the purpose of Adobe Fresco?
Designed for touch and stylus devices, Adobe Fresco is a sketching and painting application that allows artists to express themselves whenever and wherever they are inspired.u003cbru003eu003cbru003eAdobe Fresco’s live brushes are one-of-a-kind; use them to create paintings that have a natural watercolor or oil appearance. u003cbru003eu003cbru003eSimply download the app and let your imagination run wild!
Is there a better app than Procreate for creating art?
Overall, Sketchbook is a far superior option to Procreate for many of the features and functionalities that you might find yourself employing in either application.u003cbru003eu003cbru003eWith Sketchbook, you have the freedom to sketch and paint whatever you want with powerful tools.u003cbru003eu003cbru003eThe interface has been made clearer, the pricing has been made more equitable, and the work pace has been increased.u003cbru003e
Is Adobe Fresco a reliable drawing application?
Adobe Fresco fulfills my desire for an app that can deliver a realistic painting or drawing experience, and it does it well.u003cbru003eu003cbru003eThe live brushes are just incredible.u003cbru003eu003cbru003eThere have been some complaints about the lack of tools, but I don’t think we really need them until we’re working on a production with a strict deadline.
Originally posted on January 6, 2022 @ 8:40 pm


![How To Attach Sony Camera Strap [2 Methods]](https://reneerobynphotography.com/wp-content/uploads/2022/02/FujiStrap-768x498.jpg)
![How to trim in Adobe Premiere? [2022]](https://reneerobynphotography.com/wp-content/uploads/2022/09/image-24-768x180.png)
![How to add text in Final Cut Pro? [4 Simple Techniques]](https://reneerobynphotography.com/wp-content/uploads/2022/11/image-40-768x427.png)